Mask Making Workshop
Duration: 00:36:23; Aspect Ratio: 1.333:1; Hue: 72.151; Saturation: 0.043; Lightness: 0.373; Volume: 0.176; Cuts per Minute: 6.871; Words per Minute: 59.666
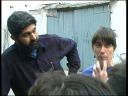
Nathan: ....Before that, I'd like to talk a little about our tools. Firstly, these are two types of cutters....
[cut]
Nathan: Basically, what I am trying to say is, what I want to say is ... basically, be careful when using tools. I don't want to see anybody cutting like this (demonstrates) or like this or something. When you're cutting —
[Cut]
Nathan: (?) atta hai
(Sounds of agreement).
Person: Come forward, then.
Person 2: Let me see, yar.
Nathan: Okay? This goes in, and this comes in from the back. Second, these red staples goes into this. And this is of the same type. This is completely flat, this is also completely flat; this is slightly curved. Okay? So first I am going to show you what we made this morning...Mukhora?
Several people: mukhota.
Nathan: The mukhota (mask) we made. This is simply made of cardboard and newspaper.
[Cut]
Nathan: ... begin this and will show you how to do it in two different ways. If you want to make a human face, then this is a good system. This (pointing to something else) is of a different type: it too can become a human face, but it can also become anything but they are different types. This is good, I like this because — [cut]
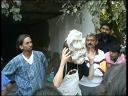
Nathan (mask on his face. Removes mask): Okay? So this is a good technique just to start making masks. So we're going to make these two types for our drama. But this is just a demonstration, or in case you all need to use it later for some work—
[cut]
Nathan: ... blank surface, and turn it into a face. This is now plain.
Woman: This board here, when we cut it, then we'll be able to create a three dimensional effect of our faces.
Nathan: (Agreeing). Because this can be made from this as well, but it isn't that nice —
[Cut]
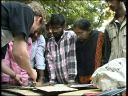
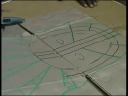
Nathan (bending over cardboard and drawing lines): And third, this will come from the top.
Woman (pointing): This one.
Nathan: This will come from here. And we will cut this one. Okay, so this is the outside line. Now, this nose line, which for a person —
[Cut]
Nathan: And then on either side ... again, it doesn't have to be... one, two inches. Now this has become the left and right portions. Now on our face we have cheekbones, everything, right? Our faces go back from the cheeks. So I am going to put in cheekbones ... right there. And then from here, our faces also go back from our mouths, down here, kind of right down here. So I'm going to put in one there and one more there. Okay, sorry, and these are lines that are actually going to be cut.
Woman: The green ones?
Nathan: Yeah, The green ones we're going to cut. Forgot about that.
Man: And the black ones?
Nathan: And the black ones are just scores, yeah. Okay, so these are the ones we're going to cut.
Woman: Will you cut the middle one also?
Nathan: Yeah, I'm going to cut down here, just down here I'm going to cut.
Woman: Fold back..
Nathan: Yeah, exactly.
Woman: When this is taken out, and this become a strip, then he is going to bend this backwards.
Nathan: Right, exactly. And you do it all the way to, basically the top of the.. right here... Which is basically this point. I have one, two, three, four, five, six.
Woman: That's what it's supposed — six is a good number — three, three.
Nathan: Okay, so we have this. Now based on this—
[Cut]
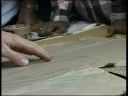
Nathan: Okay, so what I'll do is I'll just start cutting.
Woman: And when we cut with a cutter, we always do it on top of some solid piece or wood, yes? If we put it on top of cloth then the blade will become blunt.
Woman: The ease with which you're cutting, it's not that easy —
[Cut]

Nathan: Start with the cheeks and just kind of overlap it... can everyone see? I just kind of overlap it like that.
Man: How much?
Nathan: Just one inch, half inch. If you overlap it a lot it gives a very much curve, if you overlap it just a little bit, it gives a bigger curve.
Man: And the overlapping has something to do with the shape of the face?
Nathan: Exactly. Exactly. You'll see. If you want—
[Cut]

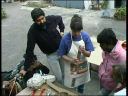
Nathan: And I chose to demonstrate on this cardboard — this cardboard is not very good, yes? I chose to demonstrate because I wanted to save the good pieces for you. Usually this doesn't happen, this is all kind of falling apart. Yeah, it should not happen like this. Now you start pulling these back in. [Pulls them back in and finishes stapling them]. This is more like a demonstration model. And now, we went from a flat surface, to a human head looking — to something that is supported in the back. At the back you can put a stick, or your own head. Now what we need to do... now, how do we make this, this inside? On top of this, what we have done, is just we've taken newspaper... Okay, great. Thank you. Lets start with the nose. But you can start from the ears, from anywhere. This is a nose. Big nose, small nose. For a small face, this looks extremely funny, but it's fine. Okay, so this can be made big...
[Cut]
Nathan: I did it, but I did it with great difficulty.
[indistinguishable conversation]
Nathan: So when you're making it, you don't just need the eyes, nose and mouth, you need expression as well. For expression, you can add anything... [Picking up a mask] He's an old man who is really just upset with life and whatever. he's just a cranky old man. Okay? So now I won't complete the entire thing, but I want to show you how to —
[Cut]
Nathan: ...add this.
Sudhu: Both sides?
Nathan: Actually just one. One is fine. It kind of gets onto this and that's fine but you don't have to do both sides. One side is good enough. There's various ways to do it. I do it in my hand, some like to put it down and just do it like that ... You work out your own way.
Woman: This is coming out. If you do this slightly neater than this might be more curved. This has come out a little from here.
Nathan: Yes, it has. This shouldn't happen: I've done this in a big hurry, that is why this has happened. But—
Woman: But the cheek that is there, it should be neat and smooth, not half jutting out here and half jutting out there.
Nathan: With bigger flat surfaces, you can use bigger pieces but with the corners... like how we —
[Cut]
Nathan: And this, you tuck this in all the way inside. It should go all the way inside. And then —
[Cut]
Nathan: There are two ways of doing it. You can do it after it's made as well. This one I actually with these eyes, I made with the intention of being more of a —
Sudhu: A display.
[Cut]
Nathan: The mask's eyes are placed higher. If you wear it, your eyes are lower, so you can make another eye slot there.
Woman: And that doesn't look strange?
Nathan: No. What we do is then you put on some fabric so that—
[Cut]
Nathan: What you have to think about. If it's going to be a mask to be worn, you should think about how it fits on your face, but there is always ways to cut... This, for me, I would probably be looking out here and here. So I'll just integrate something into the design of the mask so that I can look out of that. Add to the design of the mask, so that you can see through it. Understood?
Man: Can you make a few curves from the inside as well?
Nathan: From the inside?
Man: From the back.
Nathan: if you look at it, it will look entirely plain. But you who are wearing it, can see through it.
Woman: How many layers of papier mache do we need on top of this?
Sudhu: Three. Four.
Nathan: Three... No, two or three. Because this is strong. Before, the ones you made...
Woman: They made many layers.
Nathan: Yes, because they didn't have this base.
Woman: Or structure.
Nathan: Okay? The second thing is we made the first layer and maybe we made it and then disliked it, then what? You can tear it, and add another eye. This eye is slightly big...
Woman: So if you don't like the face...
Sudhu: What we want to do to the kind, that's what we're doing here.
Nathan: You can just break it. So be aware, this nose should be more pointed. We don't like this. Then all we have to do is change it and make it more pointed. With some more papier mache. You can just change it as many times as you want. If you want it bigger and rounder, then just tear it and make it rounder. Okay? So this is one technique for making a mask. But this is just one technique...
Nathan: So this basically is good for human face. If you want to make an animal...
[Cut]
Nathan: You put a few pieces on and then you're ready to go.
Woman: We can't put on these long papier mache strips. I mean, these —
[Cut]
Wendy: Um, huge projections, beaks, mouths, large ears, things like that.
Someone: Understood?
[Cut]
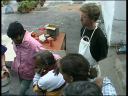
Wendy: Cardboard shrinks a little bit and then you can't get it on your head. So you want it a little bigger and if it's too big, then you can always pack it with something to fit.
Sudhu (explaining in hindi): So you have to make it slightly bigger than your actual head size because the cardboard shrinks a little after the papier mache.
Man: And if it's too big, then we can put something in it.
Man: Why do we need to cast it like this?
Sudhu: If its extra big, then it doesn't matter, but it shouldn't be extra small. We can't make it bigger.
Wendy: Next get... So that it sits, sort of a helmet.
[Cut]
Nathan: One thing. (Wendy pauses). No, keep going, keep going. Now what I do, is instead of measuring this for the first time, you just get a long piece here, put it on, go like that, and then you know just know where to staple and then you just cut if off. So these are just slight modifications on what Wendy is doing.
Wendy: I want to make a bird. Okay so, for the beak... I'll do Nathan's technique.
Woman: What you've shown us about different, different sizes... is it just that it's different or is there any use?
Nathan: Different?
Sudhu: Staplers.
Nathan: Ah, okay. No.
Wendy: ... Is that, um, you want to build... I'm going to do the, the ... [cut] (?) into the whole. So here I'll have maybe a (?) across here, maybe one here and maybe two more bridges across here.
Wendy: And while you're doing it, you want to make sure that you have everything sort of centered. So that the lines are going this way, so that I can bend it. If I do it this way — I don't have a piece. Like this one, it goes... the length of this strip, so you have to bend it this way. So it's much easier to —
[Cut]
Wendy: ...Have your beak straight underneath or you can actually curve it. So all these are decisions you can make as you build it. And just to save time, I'll make it straight across.
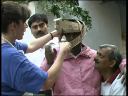
Wendy: Okay, um, and so one thing you have to think about is where you place this. If I put it any further back it would be hitting his face. So I might want to bring it out a little bit more, so that when he moves it is not hitting him. And if you really pack it well so that it fits tightly on his head, it shouldn't fall down on him.
Wendy: Okay, so, we have the bird. And if you want to build up sort of a crest on his head, then you can do things like this. Or you can have two... you can make sort of ears. Or you could, if you want, close this up. You don't have to. Actually, it's kind of nice to have that space in there. You just papier mache inside of here. And you probably do, because people will see inside. I can't wear it because I have this thing in my hair. So when you papier mache it, you take the papier mache and go all the way inside. So it really looks like a beak and a mouth. Where as if you just made it flat, it's not as interesting, you don't have that space in there. And then his face is hidden because then it becomes like a cavern of dark space.
Woman: Wendy, if I could just see for a minute?
Nathan: Wendy and Kalia — can you — can we use that space to work on?
Woman: Nathan?
Nathan (to someone): This is different...
Someone else: This is fine to work on?
Nathan: Yeah.
Pad.ma requires JavaScript.